
admin
06 Jul 2026
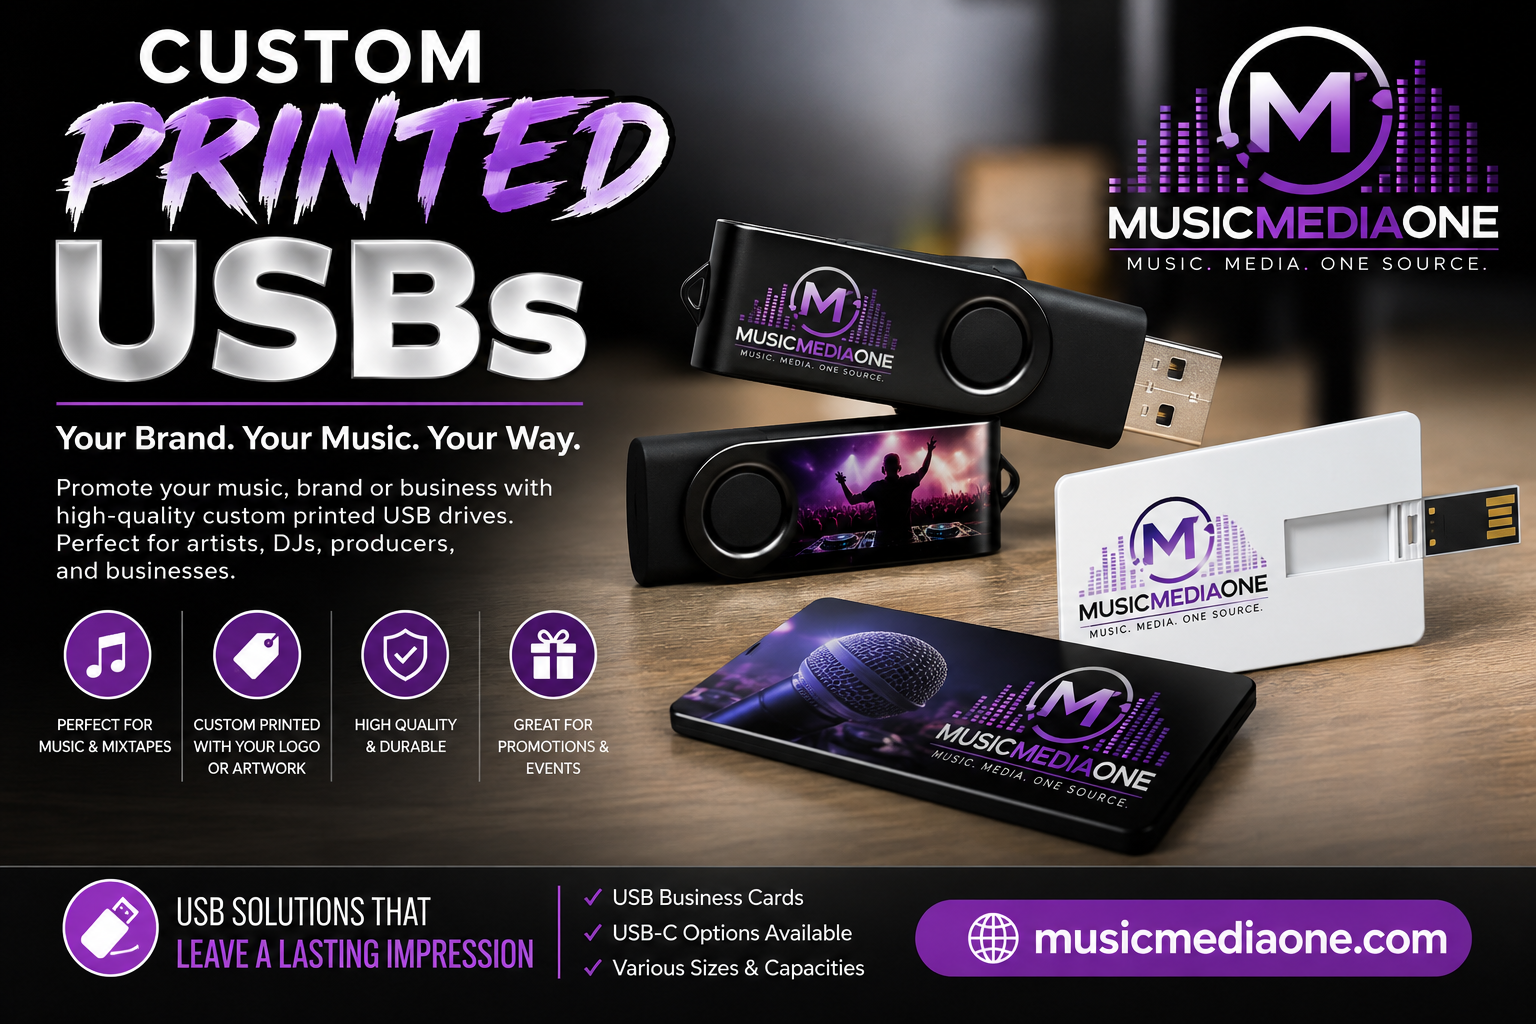
Custom Printed USBs

You finished the album. Or the sermon series. Or the conference video package. The files are mastered, exported, and sitting in a folder on your desktop. Now you’ve got the same problem a lot of artists, DJs, and church teams have. A streaming link feels disposable, but a stack of CDs may not fit how your audience listens anymore.
That’s where custom printed USB drives earn their keep.
For creators, they’re not just storage. They’re merch, delivery format, keepsake, and retail product all in one. A rapper can load an EP, backing tracks, cover art, and a press photo folder. A church can preload a full teaching series, study notes, and ministry resources. A DJ can turn a release into something physical enough to sell at the table instead of telling people to “go find the link later.”
I’ll be direct. If you want something that feels more premium than a download card and more current than a standard disc for certain audiences, custom printed USB drives are one of the smartest formats you can buy. They give you room to bundle more content, shape the product around your brand, and hand people something that still feels tangible in a digital-first world.
Your Modern Merch Solution
A lot of creators land here after trying to split the difference between old-school merch and modern delivery. You want something physical, but you don’t want to force your audience into a format they’ve stopped using. That’s especially true if you’re selling music after a show, handing out media at a ministry event, or building a premium bundle for supporters.
A custom USB drive solves a practical problem first. It carries the files people want in the formats they already use. Audio files, videos, PDFs, artwork, sermon outlines, photos, bonus material. No one has to redeem a code, remember a password, or dig through an inbox later.
It also solves a merch problem. A plain file transfer feels forgettable. A branded drive feels like an object. That matters more than people admit.
People buy merch partly for the content, but they also buy it because it feels like a piece of the project.
A singer-songwriter can sell a wooden USB with an album, lyric booklet, and acoustic demos. A church can hand new members a branded drive with welcome videos, ministry guides, and sermon archives. A wedding DJ can package event media for clients in a polished format instead of sending another generic cloud folder.
Why creators keep choosing USB over a simple link
Links are fine for access. They’re weak for presentation.
Custom printed USB drives give you three things that a link can’t:
- A retail object: Something you can put on a merch table, gift table, bookstore shelf, or conference check-in table.
- Room for extras: You’re not limited to one album or one video file. You can build an experience.
- Brand permanence: Your name, logo, or artwork stays with the product.
If you’re making something personal, artistic, or ministry-focused, that difference matters. You’re not just distributing files. You’re packaging your work in a way people can hold onto.
Understanding the Custom USB Drive
Think of a custom USB as a digital jewel case. It isn’t just a memory stick. It’s a complete product made of three parts. The drive body, the outside branding, and the files inside.

That mindset changes how you buy. Instead of asking, “What’s the cheapest flash drive?” ask, “What product fits this release?”
The body is the format
The body is the physical shell your audience touches first. That includes the shape, material, cap style, swivel design, keyring option, and overall feel in the hand. These elements make the product behave like merch instead of office supply stock.
A metal body feels clean and modern. Wood feels warm and handcrafted. Plastic can be cost-effective and versatile, especially when color matching matters. Novelty shapes can work, but most creators overuse them. If the shape distracts from the release, skip it.
The imprint is the cover art
The print or engraving is the equivalent of album packaging. This is your identity layer. Name, logo, title, artwork, church branding, event name. If the drive body is the case, the imprint is the front cover.
Keep the design simple enough to read. Tiny text disappears fast on small products. One strong mark usually lands better than cramming in every social handle and slogan you have.
The preload is the product
This is the part too many buyers treat like an afterthought. It’s the reason the drive exists. The files are the actual experience.
The format has grown up enough to handle serious content. The first USB drives were invented around 1999, and by 2013 drives with 1 TB capacity were available, with production drives reaching 4 TB today, according to this overview of USB flash drive milestones. For creators, that means the medium moved far beyond simple document transfer. It can carry complete albums, video teaching libraries, photo archives, and large media bundles.
Practical rule: If the files matter, design the USB from the inside out. Start with the content, then choose the body and print that match it.
That’s how you end up with a product people keep instead of a giveaway they toss in a drawer.
Choosing the Right Drive Body
You finish an EP, sermon series, or conference bundle. The files are ready. Then the wrong drive body turns a solid release into a nuisance to use. That mistake costs more than a nicer shell ever would.

Start with the audience and the content. A merch-table release for fans has different demands than a donor gift, church resource library, or DJ promo pack. The body has to fit how people will carry it, plug it in, and keep it.
Capacity should fit the content
Buy enough space for the finished experience, not just the current folder on your desktop.
Capacities for custom USB drives commonly run from small promo sizes up through large media-friendly options, and write endurance varies by memory type, as outlined in Disc Makers’ custom USB guide. For creators, the practical takeaway is simple. Match the drive to the release, then leave room for a clean preload structure.
Here’s the way I’d size it:
| Project type | Better fit |
|---|---|
| Audio album, MP3s, PDFs, cover art | Lower-capacity drive |
| Album plus WAV files, stems, videos | Mid-range capacity |
| Sermon video series, conference sessions, training media | Higher-capacity drive |
| Large archives or mixed media bundles | Plan generous headroom |
Leave margin for bonus files, thumbnails, alternate formats, or a start-here folder. A cramped drive forces bad compromises late in production.
Connector choice matters more than buyers think
This is the usability decision.
A classic USB-A connector still makes sense for older laptops, desktops, media players, and church office machines. It is familiar, easy to replace, and often cheaper.
A USB-C drive is the better pick for current laptops, tablets, and phones. If your audience skews younger, mobile, or Mac-heavy, start here.
A dual-connector drive is the safest choice for mixed audiences. That matters for churches, touring artists, DJs selling at live events, and anyone handing drives to people with a wide range of devices.
Quick connector comparison
- USB-A: Best for older computers and predictable desktop use.
- USB-C: Best for newer laptops, tablets, and phone-friendly distribution.
- Dual connector: Best for broad compatibility and fewer support questions.
If you’re ordering custom printed USB drives for 2025 and beyond, don’t default to USB-A out of habit. Pick the connector your audience will plug in.
Match material to your brand
Material sets the tone before the files ever open.
- Wood: Strong fit for acoustic artists, worship projects, wedding media, and churches that want a warm, handcrafted look.
- Metal: Better for electronic releases, DJ kits, premium teaching sets, and polished donor or sponsor packages.
- Plastic: Best for tight budgets, bold colors, youth events, street merch, and larger outreach runs.
- Crystal or specialty styles: Better for commemorative gifts, collector bundles, and presentation-heavy packages.
I’d keep novelty shapes on a short leash. A custom guitar, cross, or microphone drive can work, but only if it still fits in a real port, survives repeated use, and doesn’t feel gimmicky. For most creators, a clean standard body with the right finish gives a better result and causes fewer headaches.
Pick the body the same way you’d pick vinyl color, digipak stock, or a sermon booklet cover. It should support the release, fit the budget, and make the product easy to live with.
Artwork and Imprint Methods Explained
Your USB can hold great content and still disappoint the second someone sees it. That usually happens at the imprint stage.

A worship series drive with muddy text looks rushed. A DJ promo stick with a blurry cover image looks cheap. A clean imprint fixes that fast. Pick the print method that fits the artwork, not the one that sounds nicest on a quote.
Screen print, UV print, or engraving
Screen printing is the right call for simple art. Use it for one-color logos, short titles, clean icons, and high-contrast text. If your church name, artist mark, or event branding is straightforward, screen print often gives the sharpest result for the money.
UV digital printing handles artwork with detail. Use it for EP covers, gradients, layered color, photo-based art, or graphics with texture. If the release depends on the visual identity, this is usually the method to choose.
Laser engraving fits wood and metal bodies best. It gives you a permanent mark with a quieter, more mature look. That works especially well for premium sermon archives, donor gifts, acoustic releases, and collector bundles where full color would feel too loud.
Match the imprint to the release
| Project | Better imprint method |
|---|---|
| Church giveaway or event handout | Screen print |
| Mixtape art, album art, or DJ promo | UV digital print |
| Premium wood or metal merch piece | Laser engraving |
Here’s my recommendation. If the USB is part of merch, make it look like merch. If it’s part of a premium package, make it look like a keepsake.
File prep that prevents bad prints
Print problems usually start with bad setup, not bad equipment. A clean file saves time, proofs, and money.
Use the vendor template if one is provided. Keep logos and text inside the safe area. Rounded caps, swivel arms, and small imprint zones will eat weak layouts alive.
Good prep usually means:
- Keep text short and readable: A USB is too small for a mission statement, track list, and social handles all at once.
- Send vector files for logos: AI, EPS, or PDF files hold edges better than flattened images.
- Send high-resolution raster files for photos: Album art pulled from Instagram will not print well.
- Use transparency where needed: That matters when the body color should show through.
- Respect the imprint area: A design that looks balanced on a square canvas can fail on a narrow drive.
One more rule. Put one strong visual idea on the drive and stop there.
For musicians, that might be the release title plus a mark. For churches, it might be the series name and date. For DJs, it might be the cover art or logo. Once you start cramming in website URLs, tiny taglines, and six extra elements, the piece stops looking intentional and starts looking crowded.
Preloading Content and Ensuring Security
The preload is what turns the drive from a branded object into a release. If you only dump a few files onto it and call it done, you’re wasting the format.

What to preload besides the main release
For musicians, the obvious files are the album and cover art. That’s not enough if you want the USB to feel special.
Better preload packages often include:
- Bonus audio: Demos, music-only tracks, clean versions, live cuts, or alternate mixes.
- Visual extras: Behind-the-scenes photos, music videos, cover shoot images.
- PDF material: Lyrics, liner notes, chord charts, devotional guides, sermon outlines.
- Useful links: A start-here document with streaming links, donation pages, booking contact, or ministry resources.
- Press assets: For media kits, include approved photos and a short bio.
Churches can use the format even more creatively. A sermon series drive can include video files, audio-only versions, small group discussion PDFs, volunteer onboarding material, and a welcome letter from leadership. That’s a much more useful handoff than sending people into a maze of cloud links.
Organize the files like a product
Don’t preload a random folder dump.
Create a clear folder structure. Name files consistently. Add a simple read-me or start-here file so the recipient knows what’s included. If there are multiple versions of the same media, label them in plain English.
A tidy structure matters because your audience isn’t standing there with your production notes. They’re opening the drive cold.
If a first-time user can’t tell what to click, the preload isn’t finished.
Security isn’t optional
This is the part many buyers ignore until something goes wrong. If you’re distributing drives at scale, you need a clean workflow.
A professional approach should include write-protection and file verification to reduce malware risk or accidental file changes after production, as noted by Same Day Flash’s discussion of preload and production workflow. That matters whether you’re selling merch, handing out ministry content, or delivering client media.
Here’s the standard I recommend:
- Build one final master folder and lock it before it goes to production.
- Scan every file on your side before sending anything out.
- Ask about verification so the loaded content matches the approved master.
- Use write-protection when appropriate if you don’t want recipients changing or deleting the contents.
- Decide blank vs. preloaded on purpose. Blank works for flexible giveaways. Preloaded works for content products.
Security isn’t glamorous, but it protects your audience and your reputation. If you’re putting your name on the outside of the drive, the inside needs to be just as professional.
Creative Packaging and Bundle Ideas
Packaging changes how people value the product. The same USB drive can feel like a giveaway in a plastic bag or a premium release in a well-designed box.
For creator merch, packaging should match the lane you’re in. A clear sleeve can work for low-cost outreach, conference handouts, or fast merch table sales. A printed tuck box feels more retail-ready. A tin or premium display box pushes the product toward gift territory.
Packaging should support the story
A worship project with reflective artwork might fit a clean matte box with a printed insert. A hip-hop release might work better with a bold black case and sticker pack. A wedding or commemorative ministry project can justify a more elegant presentation.
Use packaging to answer one question. Is this a handout, a merch item, or a collector piece?
Bundle ideas that actually sell
The strongest USB products usually aren’t sold alone. They’re bundled.
Consider these combinations:
- Deluxe digital edition: USB drive plus sticker set and signed insert
- Church resource pack: USB drive plus printed study guide or ministry flyer
- Fan bundle: USB drive with T-shirt, poster, or wristband
- Vinyl companion: Include the USB as a bonus in a high-end physical release
- Event package: Drive loaded with sessions, plus a notebook or printed recap piece
Bundling works because the USB gives digital depth while the other items give visual and tactile value. That combination makes the whole package easier to merchandise.
A well-bundled USB release feels less like storage and more like an edition.
Keep the bundle coherent
Don’t throw unrelated merch together and hope it reads as premium. Build around one theme. If the USB contains exclusive acoustic content, pair it with stripped-down artwork and a lyric print. If it’s a conference recap drive, pair it with practical materials people will use after the event.
The best bundles feel curated. They don’t feel padded.
Placing Your Order and Final Tips
You do not want to be fixing folder names, cover art typos, and missing sermon files the day before a release table, tour date, or church event. The cleanest USB orders come from clear decisions made early. Pick the product, organize the content, and approve the art before you ask for pricing.
Quotes only mean something when the specs match. Capacity, drive body, connector type, imprint method, packaging, and preloading all affect cost. If one quote looks much cheaper, check what was removed. A blank plastic drive with basic printing is not the same product as a loaded, packaged merch piece built for sale after a set or service.
What to lock down before requesting a quote
Use this checklist before you contact a vendor:
- Pick the connector first: USB-C matters for current phones, tablets, and newer laptops. If your audience uses a mix of older and newer devices, a dual-connector model usually earns its keep.
- Finalize capacity from your actual files: Build the folder and choose from there.
- Approve the artwork: Send final art, not drafts or temporary text.
- Decide on preload status: Blank and loaded orders follow different workflows.
- Choose packaging early: Packaging affects both appearance and assembly.
Ask better questions
A first-time buyer should ask these up front:
| Ask this | Why it matters |
|---|---|
| Can I see a digital proof? | Confirms layout before production |
| What file types do you want for artwork? | Prevents print issues |
| How should I deliver preload files? | Keeps data organized |
| Do you offer verification or write-protection options? | Protects the final product |
| Are there sample photos of this exact body style? | Avoids surprises |
The production manager checklist
Here is the version I would hand to an artist, DJ, pastor, or ministry assistant before approving the order:
- Create one master folder with all final content.
- Remove duplicates and old revisions so the wrong files do not get loaded.
- Name folders clearly for audio, video, PDFs, lyrics, sermon notes, and extras.
- Export final art files using the vendor template when available.
- Review the proof carefully. Check spelling, placement, and orientation.
- Confirm the connector choice based on the devices your audience uses.
- Decide how the drive will be sold or handed out before picking the final package.
- Set the retail price from the finished bundle, not from the memory component alone.
Treat the USB like a release format. For musicians and DJs, that means sequencing files properly, adding cover art, and making the package feel intentional. For churches, that means loading the right sermons, study materials, or event media in a structure people can use without hunting for files.
Small details decide whether the final piece feels polished or thrown together.
If you’re ready to turn your album, sermon series, or event media into a polished physical product, Atlanta Disc can help you produce custom USB drives, duplication, and matching print pieces for short runs and merch-ready bundles